
4 Tips for Working with Cardboard in the STEM Lab or Makerspace
The following is a guest post from Erik Murray.
*This blog post contains Amazon affiliate links. By clicking on the links and making a purchase, we may receive a small commission at no additional cost to you.
Cardboard is my Frenemy. When I need it for a project, it’s great for students to work with. But, it can overwhelm the most experienced makerspace educator.
As anyone that’s moved can tell you. Cardboard can easily overwhelm you. Let me share what I’ve learned about working with cardboard in the makerspace classroom.
1. Getting Started
The first challenge was how to get all the cardboard I needed. At the time I had 30 groups of students. These groups were looking to build large items to complete our Caine’s Arcade project.
Caine’s Arcade is a short video about the summer when 9-year old Caine Monroy built an arcade in his father's auto shop. The video went viral and inspired the Cardboard Challenge through which thousands of students have created arcades of their own.
These are the types of engaging engineering challenges that I strive to bring to my students, but how could I possibly get enough cardboard for so many students?
In the school’s staff bulletin I asked for donations. I was promptly overwhelmed with all things cardboard. Turns out, everyone is always looking to get rid of it. This led to my next problem; how to manage and store all of that cardboard.
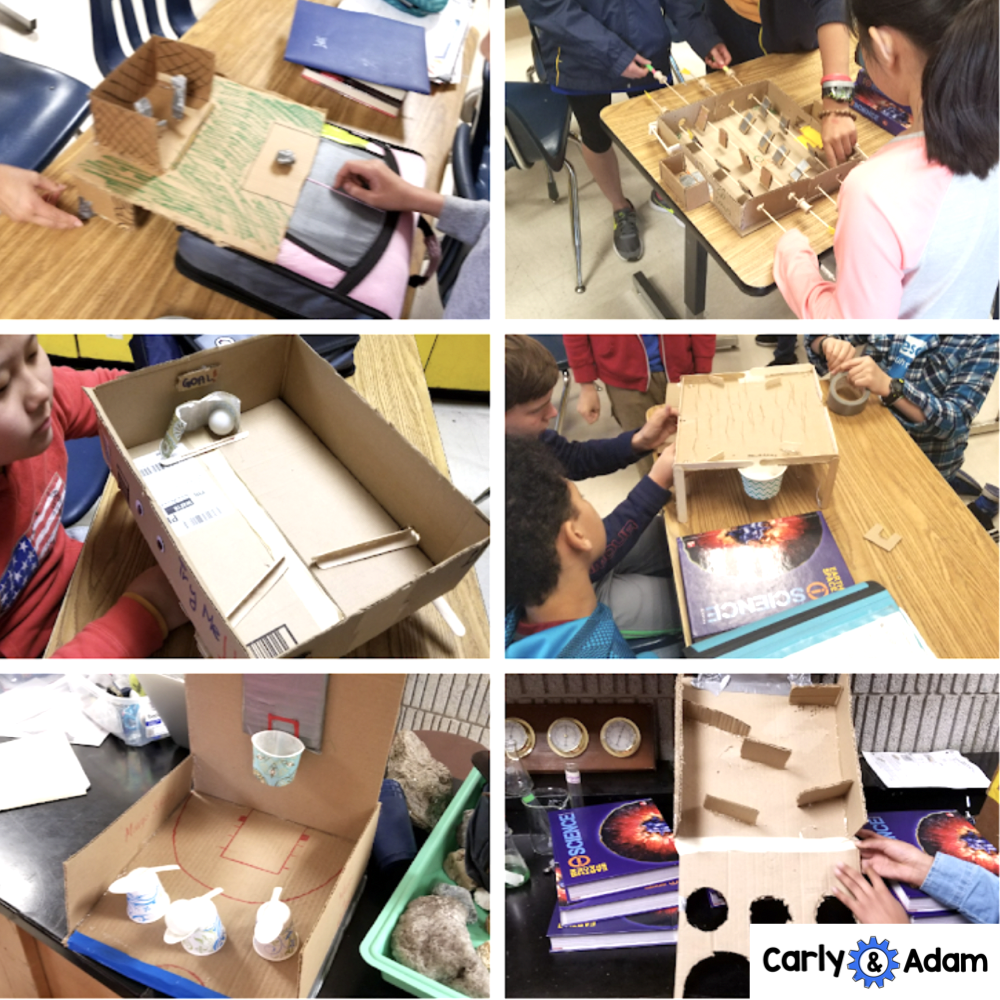
Caine’s Arcade, Lots of fun, lots of cardboard.
2. Cardboard Storage
When you have a school's worth of cardboard boxes in your room and you share a room, space is a premium. Finding a way to store all that cardboard fast and efficiently becomes a number one priority.
What I discovered is that breaking cardboard down into sheets turns it into manageable pieces. The cardboard sheets can lay flat making storage easier. I recommend cutting the boxes along the creases from where they fold. Recently, I discovered the tool ZipSnip which has been a life saver when it comes to breaking down large bits of cardboard.
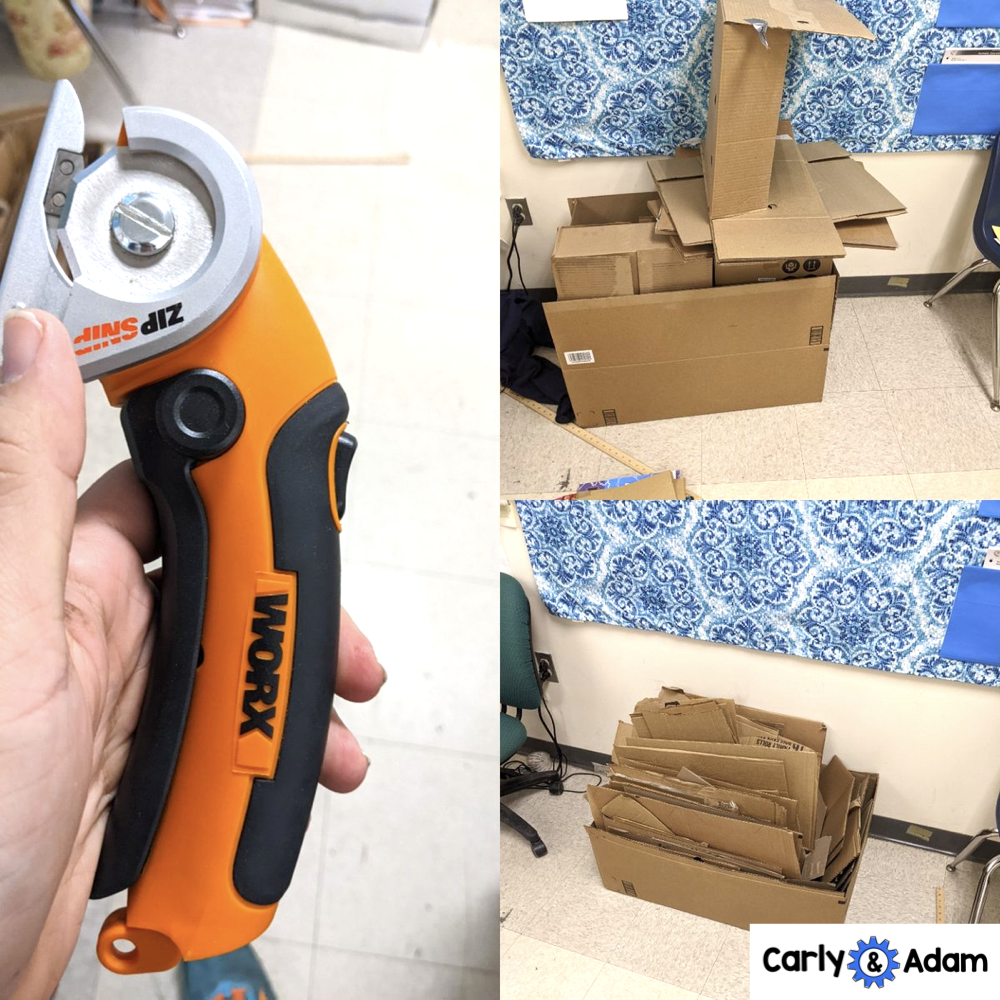
Always been a fan of finding the right tool for the job.
As students began working away on their cardboard creations other problems started to come up. Students were trying to cut their cardboard with safety scissors which could barely cut paper let alone cardboard. They also tried to cut holes in the cardboard by stabbing it with scissors then cutting around it, an action that made me nervous.
There had to be a better and safer way! The tool that I found to be best for students cutting cardboard is canary cutters. These work great in little hands, and can cut curves and circles in cardboard. They are also relatively safe for students to work with. The worst injury I've seen with one was analogous to a paper cut… and it was me who got said cut.
The other tool that I’ve become a fan of for students is the Crop-a-Dile hole punch. It is great for punching clean holes into cardboard. They also work well for punching holes in popsicle sticks. With these tips and tricks you too can have a successful and fun beginner cardboard project.

3. Managing Materials
The next milestone in my cardboard creations was when I partnered with TERC to help pilot some curriculum. The curriculum was biomimicry robotics. The goal of this project was to build robots that could dig like animals in nature. Students studied nature to mimic animals that were the best diggers, a great mix of biology and engineering.
This project used a robotics kit called hummingbird robotics, which is a great tool for cardboard robot building. The base kit does not come with wheels. This was an intentional design choice by the creators to allow for more creative builds.
This project introduced a new annoying element that comes with bigger builds. That problem was hot glue. During the eight week long unit we went through 2000 hot glue sticks. I had several minor burns and did some creative redecorating of some surfaces in the room. The following are some painful lessons I learned along the way.
When working with hot glue, make it easier on yourself by making sure that all hot gluing is done over a silicone mat. This will save your work surfaces. All the hot glue mess happens on the mat and it's easy to peel off.
For hot glue accidents get an embossing gun. Heat the offending part for a few seconds and it can remelt the hot glue. This is great for when students make the inevitable mistakes.
For managing materials in larger projects, so that you're not going through 2000 glue sticks in eight weeks, I like to give students a budget. Before using any materials students have to “purchase” them. When they don’t have money for a material they can’t buy it.
This can add another layer to planning for a project. Students have to create a proposal of what they want to build along with an estimate for how much it is going to cost to build. When students know there’s not an infinite supply of a material or that it's going to cost them they tend to be more thoughtful with the materials and more intentional with their planning.

4. You Can’t Take It With You, But You Can Re-use It
All good things come to an end. The end of a project is equal parts relief and excitement. Relief because it’s over and excitement for what comes next. In a perfect world, you want all kids to be proud of their work, take it home and display it as a trophy forever. But, that’s not the case. So many times after I tell students to take their projects home I find them outside my room in the nearest trash can. Not ideal, but hey it happens.
What I’ve started to do to combat this is to create a bin that I call the “Remix-It-Bin.” This is a place where students can put unwanted finished projects so that they can be repurposed. A claw that was once used to dig into the ground to retrieve an object is now the fence for a house. Or a basketball hoop for an arcade machine is now a hole for a mini-golf course. Seeing cardboard projects repurposed from one thing to another can be a thinking outside the box moment.
Good luck with your cardboard creations. If you try out a cardboard challenge with your students be sure to tag @carlyandadam and @mrstemurray on Twitter or Instagram. We can't wait to see what your students create!
Have more questions or need additional resources?
Download our Free STEM challenges from our Free STEM Resource Library.
Join our Free Facebook Group.
For more STEM ideas, inspiration, and collaboration with other STEM teachers be sure to join our FREE Facebook group Elementary STEM Teachers with Carly and Adam!

We hope you have found this blog post helpful. To stay connected with Carly and Adam's teaching tips and classroom freebies be sure to follow us on Facebook, Pinterest, Teachers Pay Teachers, and subscribe to our blog!

Erik Murray is a 6th grade STEM Teacher in Massachusetts. Follow Erik on Twitter @MrSTEmurray.