
3 Ways to Use Lego Bricks in the Classroom
The following is a guest post from Erik Murray.
Let’s get something out of the way right from the beginning; the plural of Lego is Lego. It's the name of a company, it's a proper noun so it has no plural. The name company: Lego derived its name from the Danish words “leg godt” which means play well.
For the longest time, Lego has been considered a kids toy. In the last few years though, Lego bricks have been playing well with education. Here are 3 tricks and tips on how to use Lego effectively in the classroom.
1. Collect and Organize
The best way I can find to get a collection is to put a notice in your school's bulletin asking for donations.
The next great place is Facebook Marketplace and local yard sale groups. Just a brief introduction and explanation of who you are, and why you need them.
After that, I find it’s good to clean bricks and there are many different ways to do this. I put them in a mesh laundry bag and run them through a dishwasher.
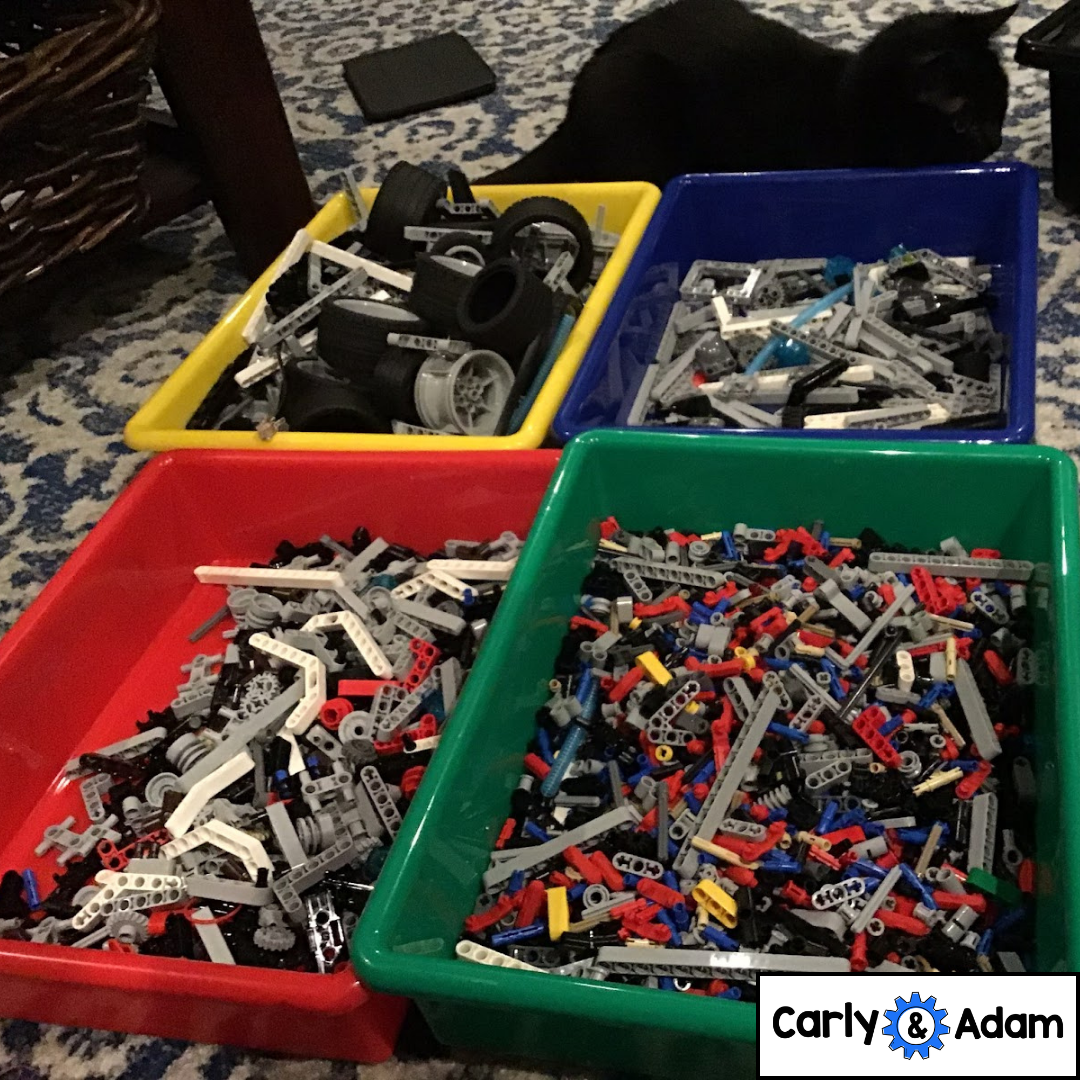
After they are cleaned, I like to separate them out into 5 different piles…
Minifigures
Tires/Wheels
Technic Pieces
Plates
Everything else.
I tend to do projects that need specific pieces, and these are the categories they always fall into…especially the Minifigures and other characters. Students will tend to fight over them if they’re out. That’s why I like to take them out beforehand.
Donations are equal parts exciting and overwhelming
The final thing that is helpful with using Lego in projects is these plant trays.
They’re the perfect size to scoop bricks into and for a group to share. They’re also phenomenal to help with cleaning up. Students put their Lego Bricks back into the bin and then put them into a storage container.
2. Visualize Learning
The first time I used Lego Blocks for anything but building something was for a visualization activity when it came to the Classification of living things. My students were having a difficult time figuring out how and why we use the animal classification system.
What I did was dump a bunch of bricks on everyone's table and I told them to sort them into groups and label them. Students picked very broad categories such as color and size to categorize them.
Then I asked students to break those groups up into subgroups. They didn’t have to be the same for each. But as long as each big group had at least three smaller groups that would be ok.
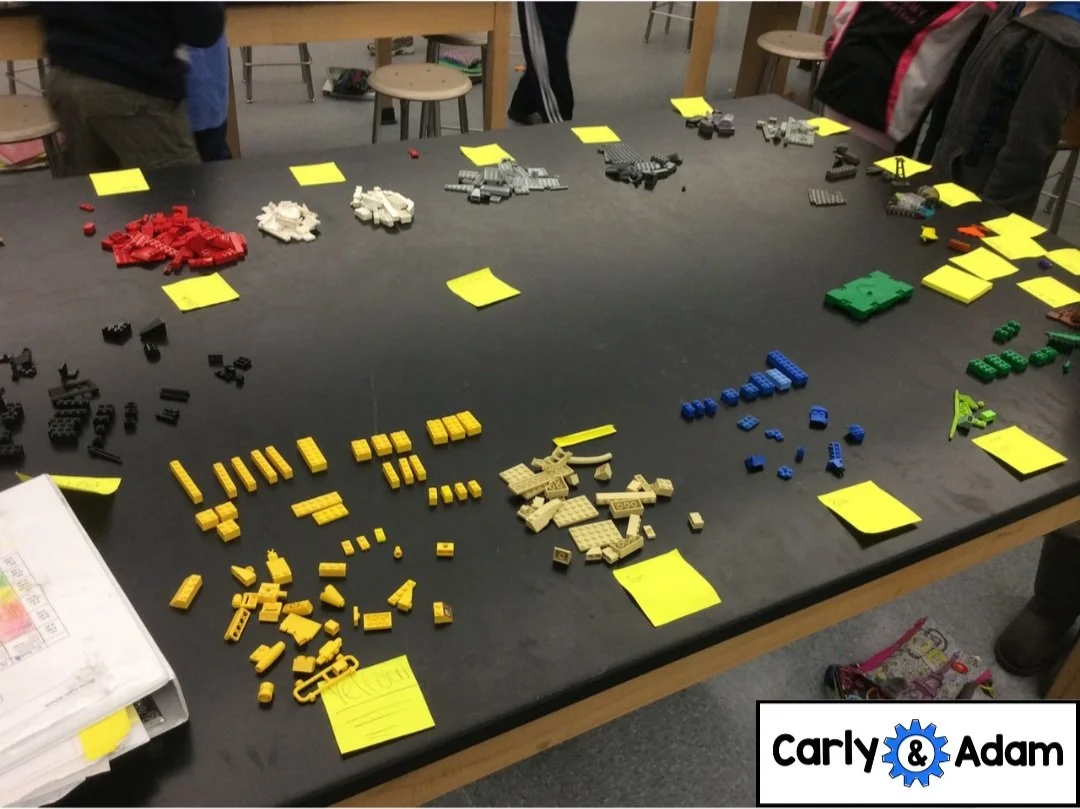
Classifying Lego blocks, to learning about the classification of living things
Students noticed that the groups started to get more specialized. We continued with this activity until most blocks were in groups of one or two. After this, I then showed the class 5 other blocks.
I had each group determine what category and group they would place it. This was when students started to finally understand how the classification system of living things worked. Legos are great for models. This is one of many ways they can be used to model something. Don’t get me wrong, they’re also pretty fun to build with.
3. Remix the Building Challenge
You get an idea for an amazing building challenge. You prep and plan for it. You excitedly explain it to your students. You’re about to say GO! And then you're met with a cacophony of whines saying “we’ve done this before.” Nothing can take the wind out of the room faster than that. Which is something that can happen with Lego Challenges.
There’s a whole lot of them out there. Odds are this is going to happen to you too…especially when you give a simple challenge like. Using these Lego Blocks, what is the tallest tower you can build? How can you change that up? Sometimes looking to the real world can help you solve this.
How I changed this challenge around was when we started to talk about the Citibank building in Manhattan. One very peculiar skyscraper. It’s built on stilts because when they bought the land from the church that owned it. The church set a condition that they had to build a new church on it and they could build a skyscraper above it.
The next problem came, when the skyscrapers main beams were bolted together. Instead of welded to save money. This made the building cheaper. But, it made it so that if it wasn't fixed the building could shear itself apart in hurricane force winds. Much like a hurricane that approached it in the 1980’s. Here’s a little clip about the whole almost disaster.
So, how could I turn this into a Lego Challenge?
First students still have to build the tallest tower on post it note. Much like skyscrapers they don't have all the space in the world for a base. So a post is the footprint they can build on. But, that’s the whole story of the Citi-Bank building. It also was built above a church.
Each group then gets a rock and that rock has to cover a corner of their post-it, they can build on the rock. Would the church want a big support beam running through it?
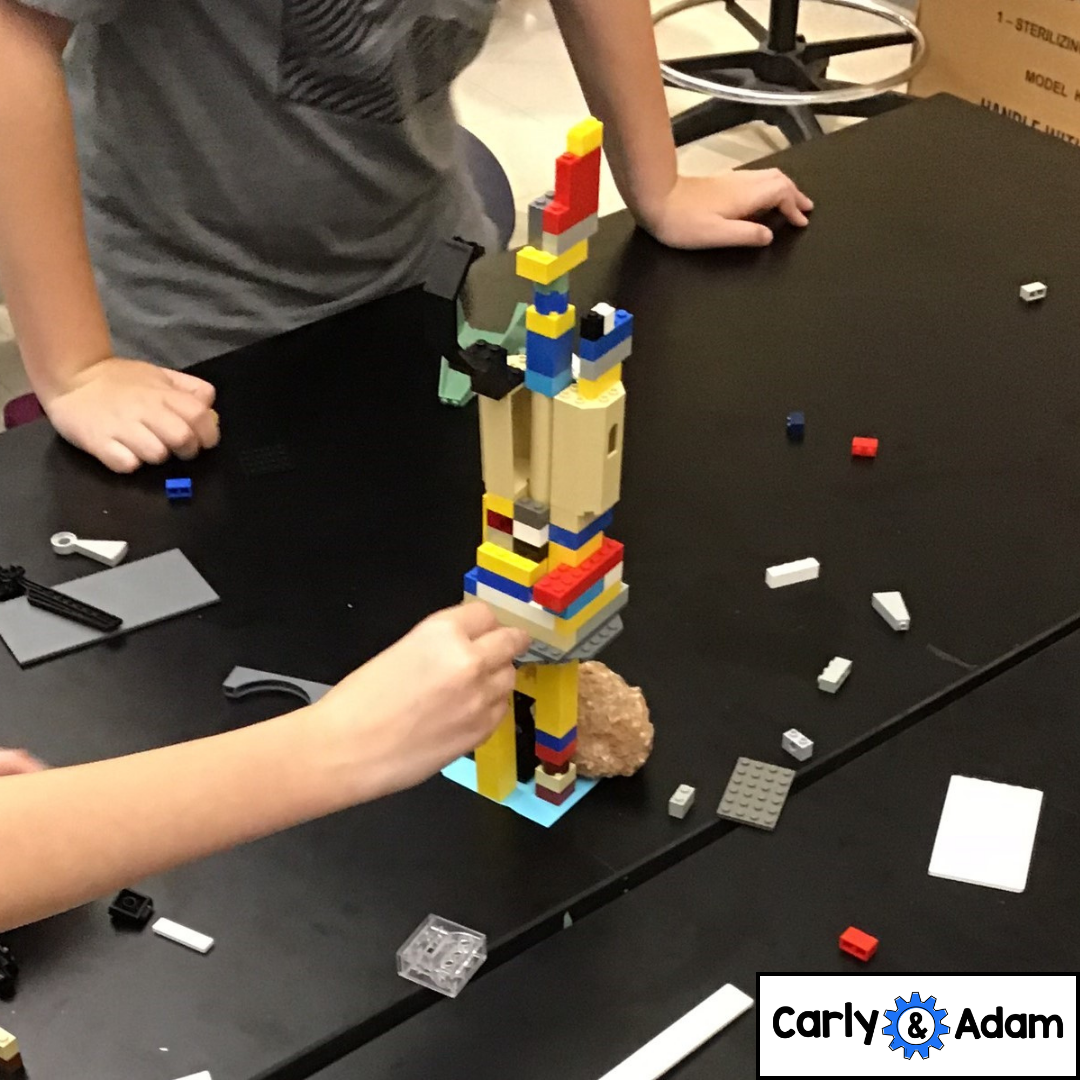
Building on a post-it with a rock
Finally, the Citibank building had to survive hurricane force winds. To simulate a hurricane, I would grab a container lid and fan it towards the tower 3-5 times to see it could stand.
That’s all you need to get started with Lego in the classroom. Have fun and keep building!
Have more questions or need additional resources?
Download our Free STEM challenges from our Free STEM Resource Library.
Join our Free Facebook Group.
For more STEM ideas, inspiration, and collaboration with other STEM teachers be sure to join our FREE Facebook group Elementary STEM Teachers with Carly and Adam!

We hope you have found this blog post helpful. To stay connected with Carly and Adam's teaching tips and classroom freebies be sure to follow us on Facebook, Pinterest, Teachers Pay Teachers, and subscribe to our blog!

Erik Murray is a 6th grade STEM Teacher in Massachusetts. Follow Erik on Twitter @MrSTEmurray.