
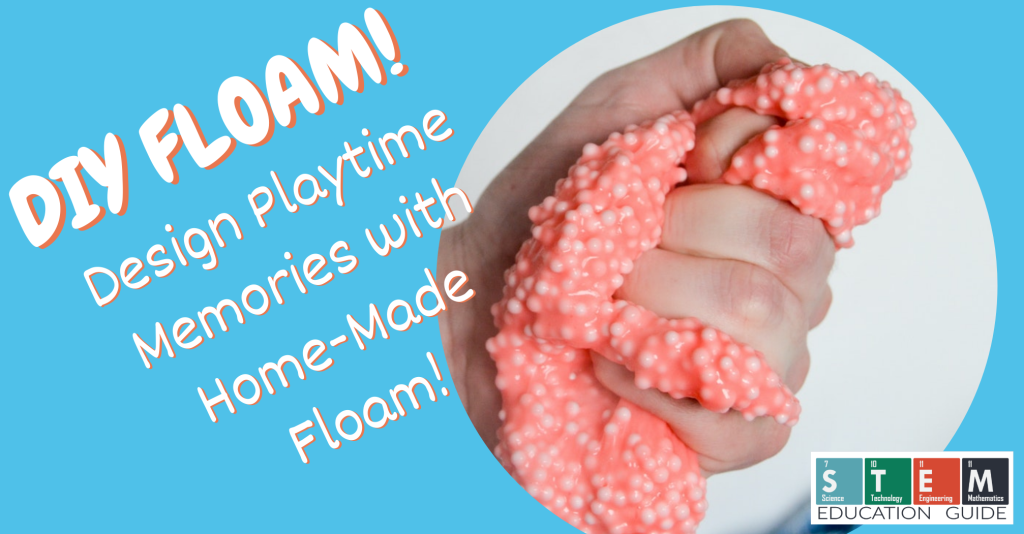
I recently bought floam for my nephews as a gift, and they LOVED it! You can play with it for hours, making creations.
The best part – it’s nowhere near as messy as playdough!
It got me thinking… I’m pretty sure I can make this! After several at-home science experiments and combinations, I figured out the perfect recipe for a nice tennis-ball size of homemade floam.
Keep reading for the full recipe on how to make DIY floam at home!
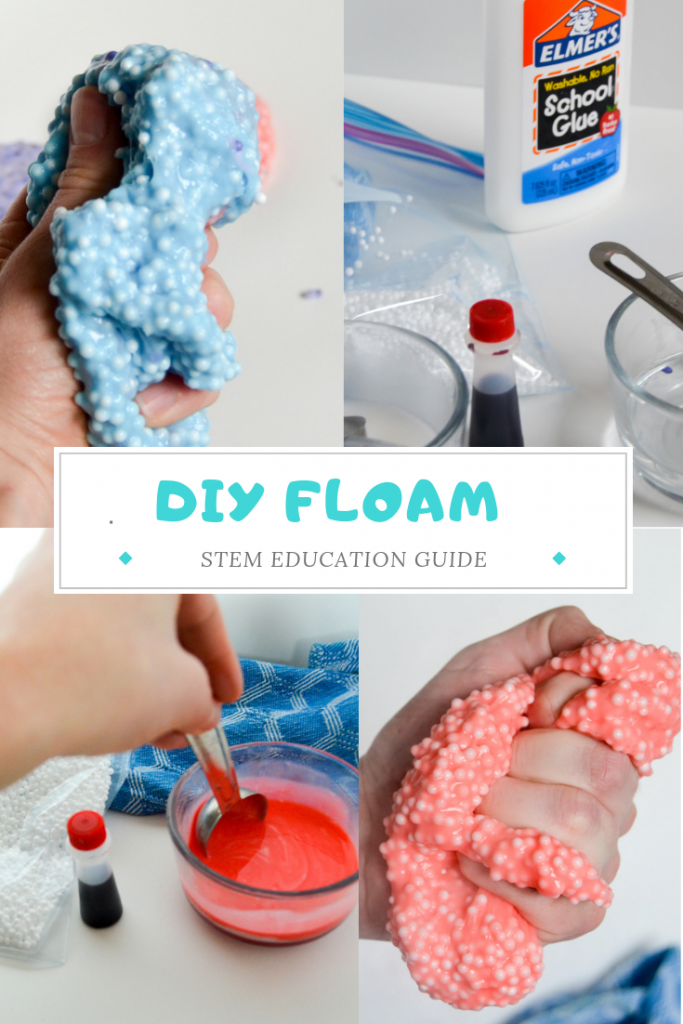
Table of Contents
What is Floam
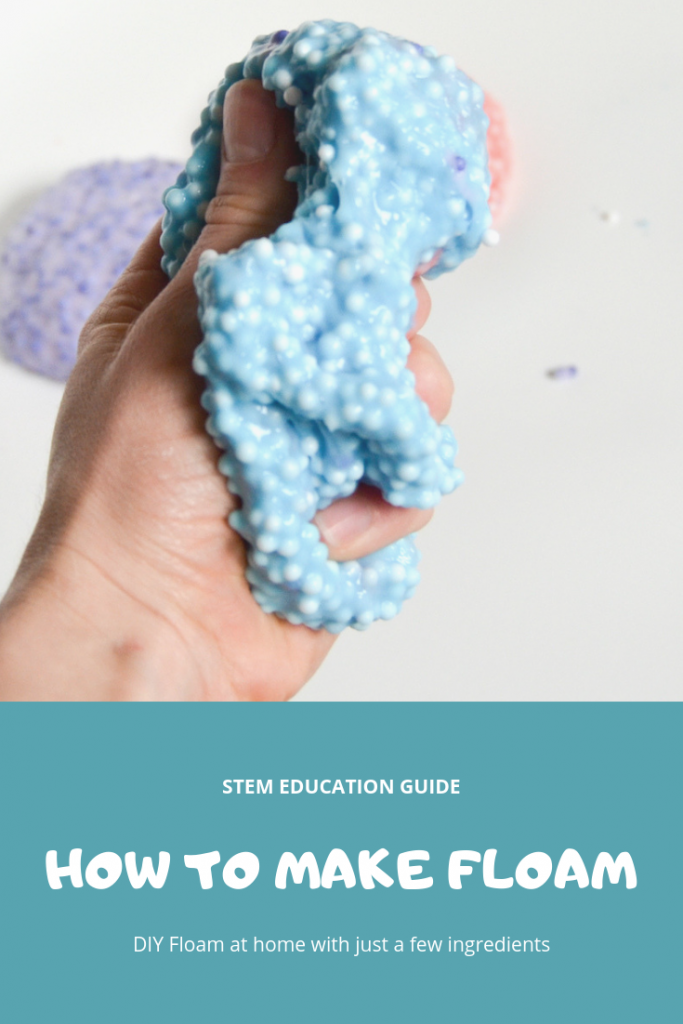
Floam is simply a combination of slime and poly-fil microbeads (the foam beads you use in a beanbag chair.) You can buy these online or at a craft store.
Floam sticks to most anything for decoration but can be easily removed if desired. Floam is essentially clay + polystyrene (aka styrofoam).
Due to the characteristics of floam, it’s not foam or slime. Once you and your kids start to play with floam, you’ll understand why I’m so excited about it!
How To Make Floam at Home
The ingredients for floam are similar to those you use for slime. If you’ve made DIY slime at home, you know the process!
We bought a variety pack with different colors, but in the end, I liked the white foam beads with a bit of food coloring added best!
Floam Ingredients
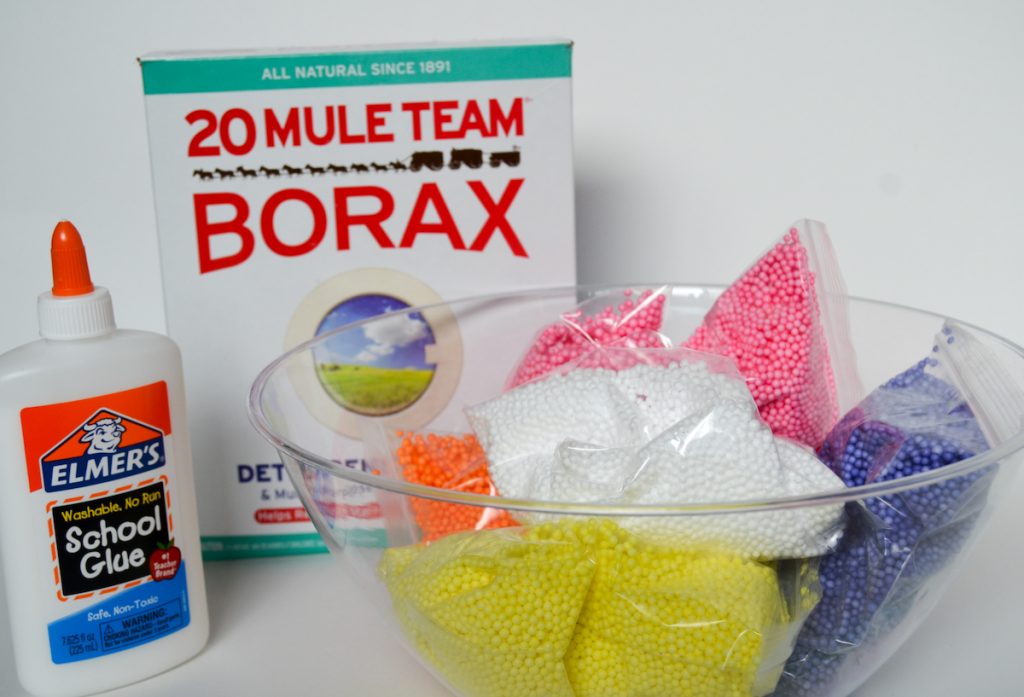
- 1/2 Cup of Polystyrene Micro Beads.
- 2 Tablespoons of Borax.
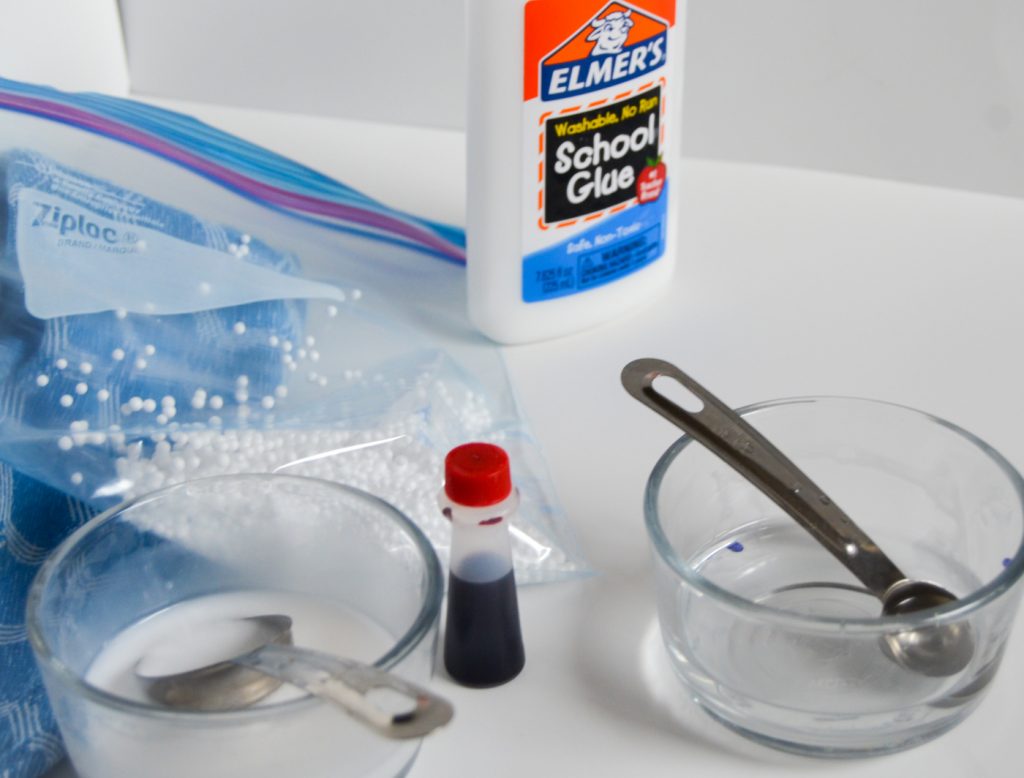
- 1/2 cup + 3 Tablespoons of Hot Water
- 3 Tablespoons of White Glue. Elmer’s glue will work fine.
- Food coloring (the link is to my favorite brand).
Steps to Make Floam
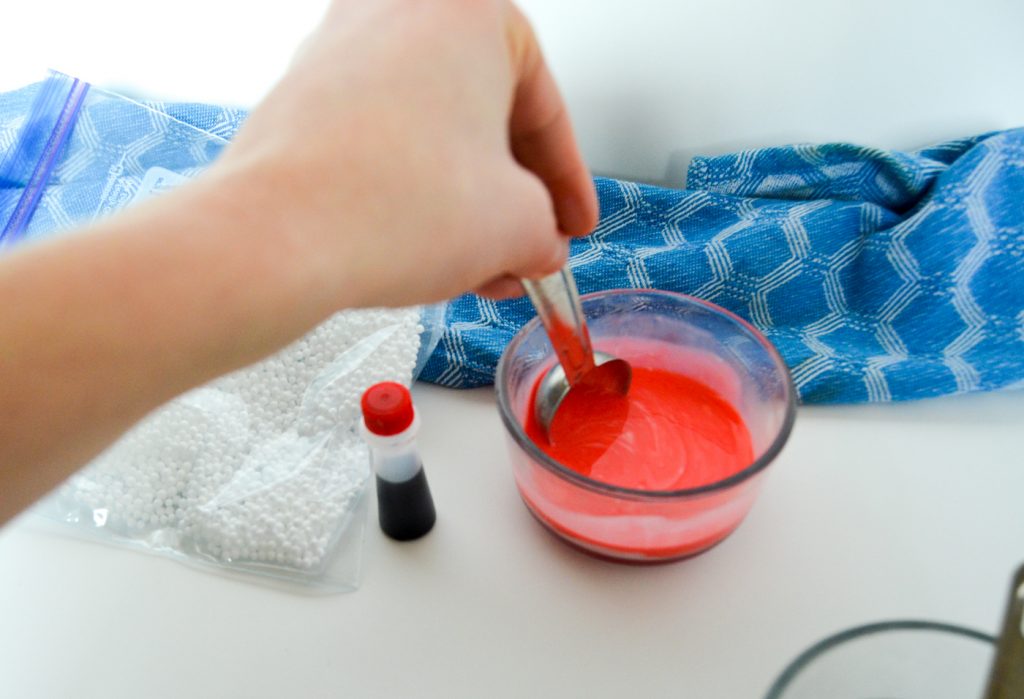
- Add 2 tablespoons of Borax into 1/2 a cup of very warm water. Stir until it is completely dissolved.
- Mix 3 tablespoons of glue with 3 tablespoons of warm water until completely mixed.
- Add food coloring of your choice to the glue mixture.
- Add the glue mixture and 1/2 cup of the poly-fil beads to a plastic bag. Stir and shake the sealed bag until the styrofoam beads are completely coated with the glue mixture.
- Add the borax and water mixture to the plastic bag, seal the bag, and mix thoroughly with the glue. Be sure to start mixing quickly! As soon as the borax combines with the glue, it will start to change.
- Take the floam out of the bag and play! Be sure to store in an airtight container after using as it does start to dry out.
Does Floam Dry Out
Floam does dry out. If it’s a warm summer day and your kids play with it outside or in a warm house, you might be surprised how fast it starts drying out.
You certainly don’t want to leave it sitting on the counter overnight if it isn’t stored correctly.
How To Store Floam
Making this with your kids will be fun, but they will want to play with it a few times. You can store it in a plastic container with a lid, so it seals airtight. I recommended these plastic containers as you can push some air out of them to make a tight seal.
Try and avoid letting it air out overnight. You can also put the floam in a Ziploc bag and squash it around in there for younger kids, so there’s no chance of making a mess.
How To Make Floam Sticky Again
When this happens, you’re going to want to add a few drops of water to it and knead the moister back in. This will restore your floam to its former glory!
How to Make Floam Without Borax
If you can’t find Borax or don’t want to use it, you can substitute it with liquid starch. If you decide that you’re going to use liquid starch, your consistency is going to be different. Your floam will be a little bit more liquidy.
This is fine if you want to use it for an art project on a flat surface or a plate, but I recommend using Borax.
Helpful Tips
We tested a few different combinations and recipe variations! You can either create a much more slime-y floam by using more glue mixture.
Make sure the beads are completely coated in the glue mixture before adding in the dissolved borax! If you don’t, the beads don’t ever completely “combine” with the floam, and you end up with white beads falling out everywhere.
We also tested using colored poly-fil beads instead of adding food coloring to the glue mixture. I ultimately thought the white beads looked best! This way, you have a more vibrant floam.
We hope you love it as much as we do!
If you enjoyed this article, make sure to check out some others we have. An excellent lesson to teach your kids along with this is, Acids vs. Bases: Fun Activities to Teach Kids.