
How to Build a Habitat: 3D Origami Triorama Activity for Kids
Are you looking for a fun and educational project to teach your second graders about different habitats and the animals that live in them?
Look no further than the Habitat Triorama project! It’s a simple way, using just a few materials, for students to learn about different habitats.

Habitat Triorama 2nd Grade STEM Challenge by Carly and Adam
You can create a Triorama using only simple materials like paper, tape, and scissors. Using post it notes for some pieces can make it easier and less messy too. We used them for the seaweed in the photo above.
Materials:
sticky notes
crayons, markers, and/or colored pencils
construction paper
scissors
glue or tape
library books on habitats (types, plant life, animals)
Cactus Hotel by Brenda Z. Guiberson
To introduce habitats to students, we use the read aloud The Cactus Hotel by Brenda Z. Guiberson, illustrated by Megan Lloyd.
It tells the story of a tall saguaro cactus that provides shelter and food for a variety of desert animals, such as the cactus wren, the Gila woodpecker, and the pack rat.

Habitat Triorama 2nd Grade STEM Challenge by Carly and Adam
The book provides a great introduction to the desert habitat and the animals that live there, making it an excellent resource for the Habitat Triorama project.
The first step in creating a Habitat Triorama project is to select a habitat to model.
Students can use a desert habitat, like in Cactus Hotel. However, you could also choose other habitats, such as a rainforest, ocean, or grassland. This can allow students to compare and contrast with the desert habitat they read about.
It's important to select a habitat that the students are interested in and excited to learn about.
Once the habitat is selected, the next step is to research the animals that live in that habitat. Students can conduct their research to find other animals that live in their selected habitat.
Then…they can build their Habitat Triorama.
How to Build an Origami 3D Habitat Triorama (Step-By-Step):

Habitat Triorama 2nd Grade STEM Challenge by Carly and Adam
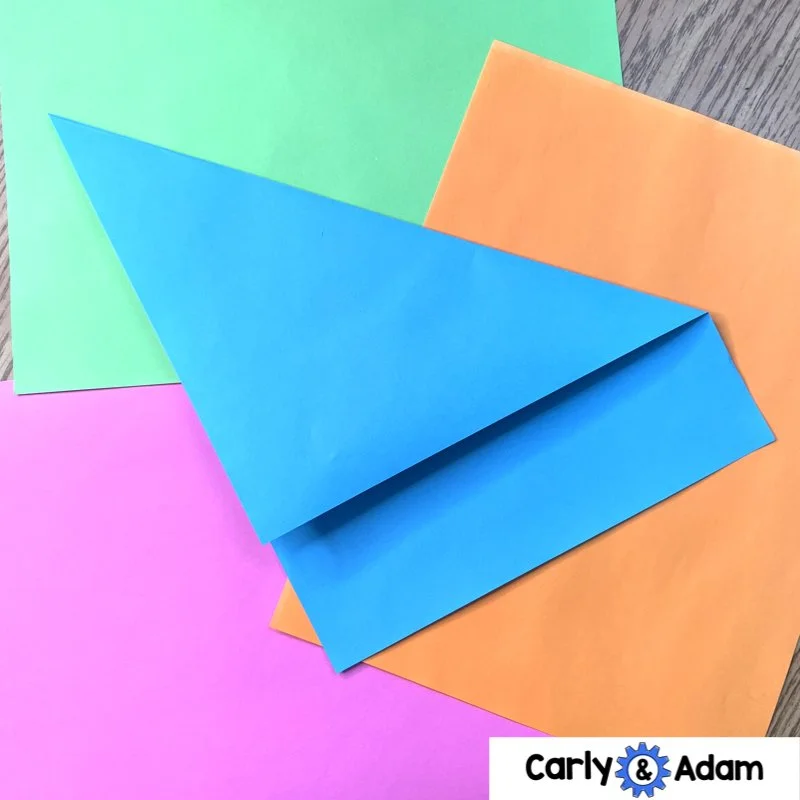
1. Fold and unfold the Top Corners to the opposite side of the paper.
Use a normal sized piece of paper. Copy paper or construction paper both work well.
Habitat Triorama 2nd Grade STEM Challenge by Carly and Adam
Start with the top right to left side of paper, and then unfold it. Then fold the top left corner to right side of paper.
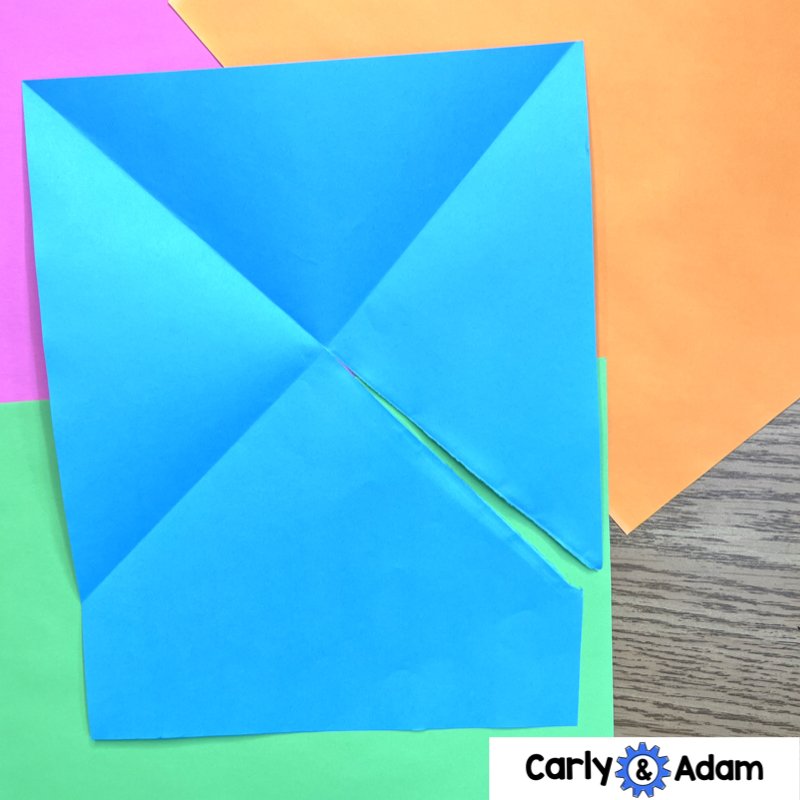
2. Unfold the paper to reveal the “X” fold marks.

Habitat Triorama 2nd Grade STEM Challenge by Carly and Adam
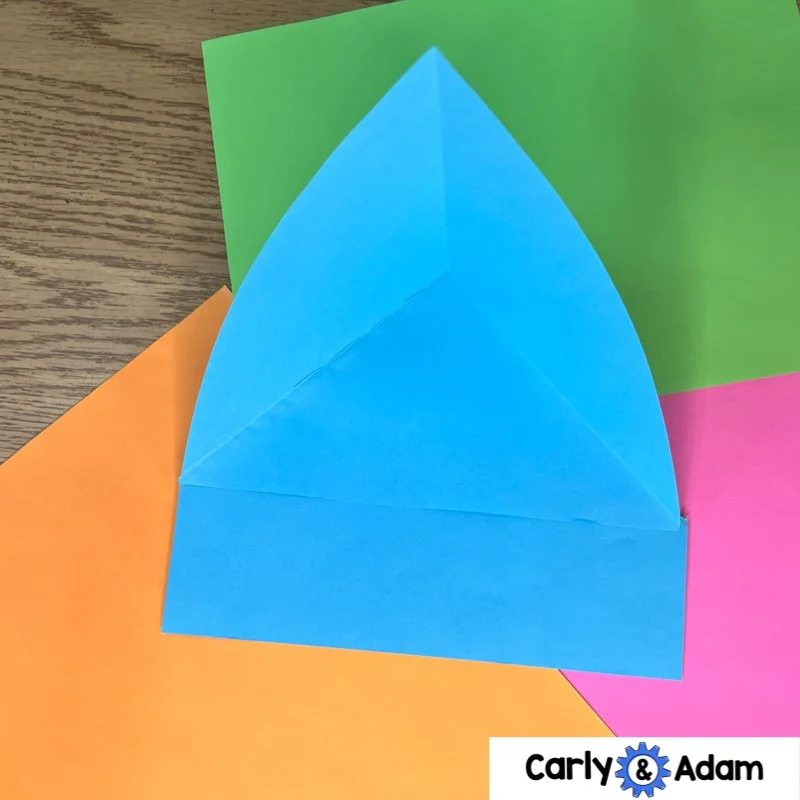
3. Cut the bottom left fold line to the center of the “x”.
Habitat Triorama 2nd Grade STEM Challenge by Carly and Adam
4. Rotate the cut line clockwise until it meets the fold line on the opposite side of the paper.
Habitat Triorama 2nd Grade STEM Challenge by Carly and Adam
As you rotate the cut line, the paper will begin to stand up and create a background for your triorama.
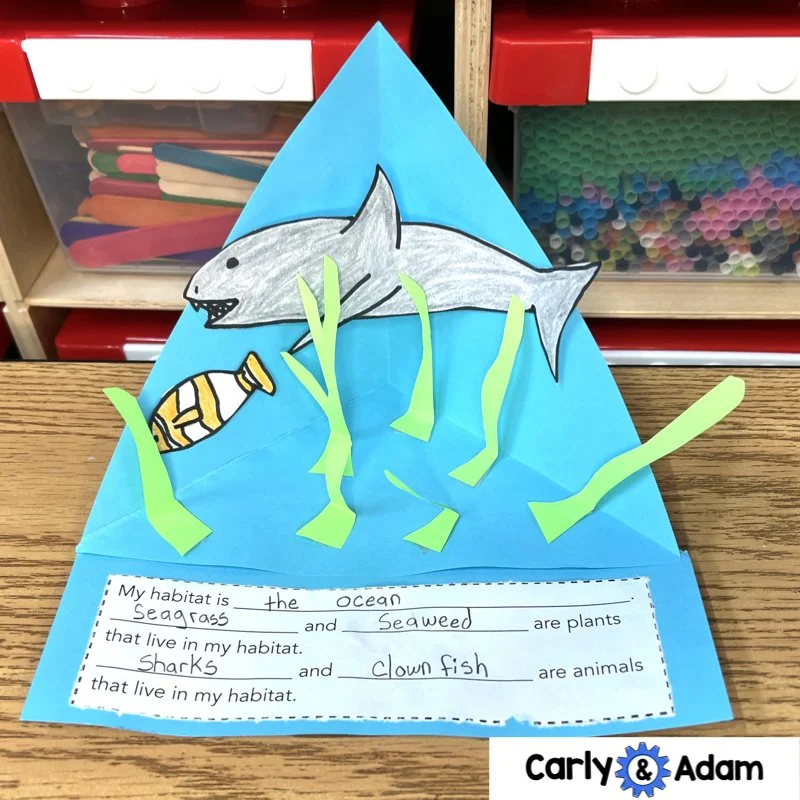
5. Cut out Animals and plants for your habitat. Attach them with glue or tape.
Habitat Triorama 2nd Grade STEM Challenge by Carly and Adam
In conclusion, creating a Habitat Triorama project is a fun and educational way for second graders to learn about different habitats and the animals that live in them. Students can create a unique and informative project that allows them to explore the natural world around them.
By presenting their completed triorama to the class and sharing what they've learned, students can further deepen their understanding of different habitats and the importance of protecting them.
So why not give the Habitat Triorama project a try in your classroom?
Have more questions or need additional resources?
You can get all 250+ STEM Challenges by Carly and Adam as part of the STEM Teachers Club Membership. Save $5 on your first month using coupon Code: CarlyAndAdamBlog.
We hope you have found this blog post helpful. To stay connected with Carly and Adam's teaching tips and classroom freebies be sure to follow us on Facebook, Pinterest, Teachers Pay Teachers, and subscribe to our blog!