CONSTRUCTION OF PARALLEL AND PERPENDICULAR LINES
In this section, you will learn how to construct parallel and perpendicular lines.
Parallel Lines :
Parallel lines are the lines which will never intersect and the perpendicular distance between them will be same at everywhere.
Perpendicular Lines :
The two lines which have the angle of inclination 90° at the point of intersection are called as perpendicular lines.
Let us look at some examples to understand how to construct parallel and perpendicular lines.
Example 1 :
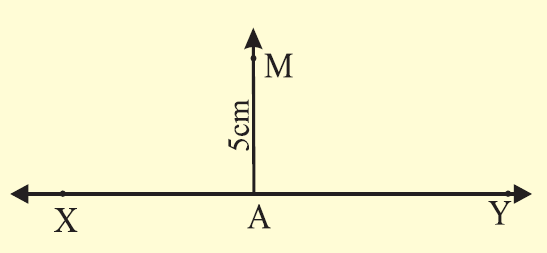
Using a set square and a ruler draw a line parallel to a given line through a point at a distance of 5 cm above it.
Solution :
Step 1 :
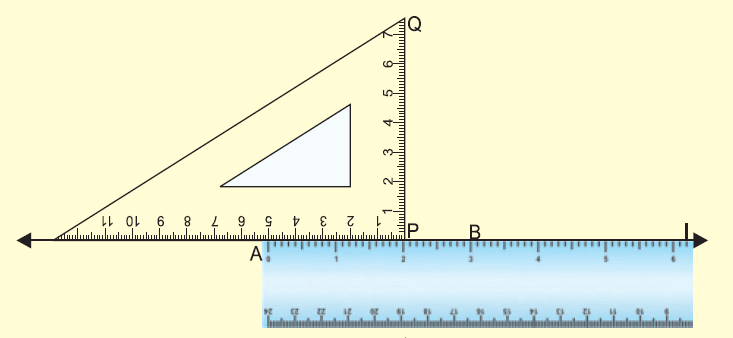
(i) Draw a line XY using ruler and mark a point A on it.
(ii) Draw AM = 5 cm with the help of a set square.
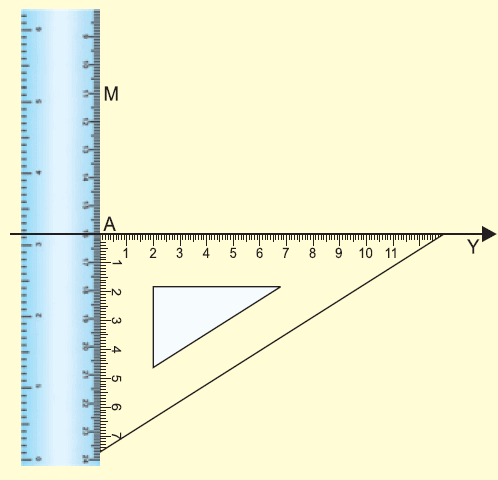
Step 2 :
Place the set square on the line segment XY.
(i) Place the set scale as shown in the figure.
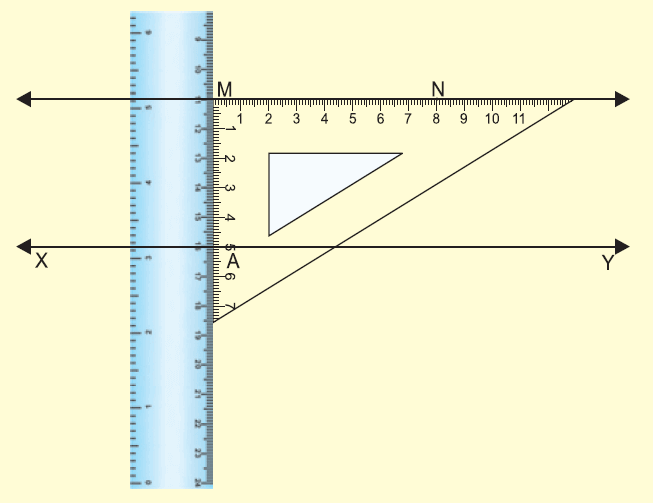
Step 3 :
(i) Pressing tightly the ruler, slide the set square along the ruler till the edge of the set square touches the point M.
(ii) Through M, draw a line MN along the edge.
(iii) MN is the required line parallel to XY through M.
Example 2 :
Using a set square and a ruler, draw a line perpendicular to given line at a point on it.
Solution :
Step 1 :
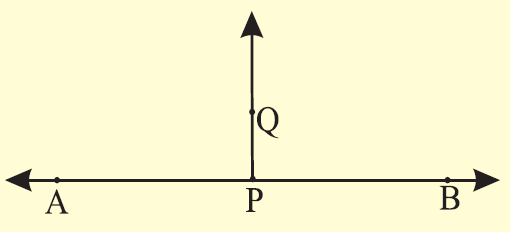
(i) Draw a line AB with the help of a ruler.
(ii) Mark a point P on it.

Step 2 :
(i) Place a ruler on the line AB.
(ii) Place one edge of a set square containing the right angle along the given line AB as shown in the figure.
Step 3 :
(i) Pressing the ruler tightly with the left hand, slide the set square along the ruler till the edge of the set square touches the point P.
(ii) Through P, draw a line PQ along the edge.
Step 4 :
PQ is the required line perpendicular to AB. Measure and check if m∠APQ = m∠BPQ = 90°.
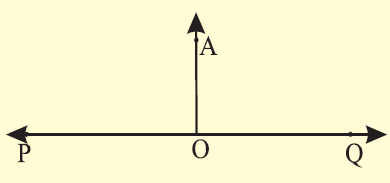
Example 3 :
Using a set square and a ruler, draw a line perpendicular to the given line through a point above it.
Solution :
Step 1 :
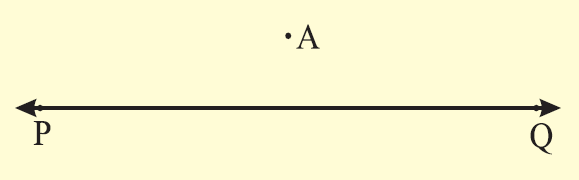
(i) Draw a line PQ using a ruler
(ii) Mark a point A above the given line
Step 2 :
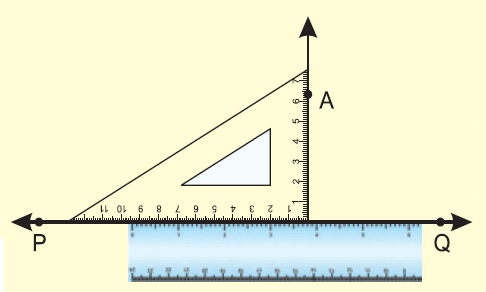
(i) Place the ruler on the line PQ.
(ii) Place one edge of a set square containing the right angle along the given line PQ as shown in the figure.

Step 3 :
(i) Pressing tightly the ruler with the left hand, slide the set square along the ruler till the edge of the set square touches the point A.
(ii) Through A draw a line AO along the edge.
Step 4 :
(i) AO is the required line perpendicular to PQ.
(ii) Measure and check : m∠POA = m∠QOA = 90°.
Kindly mail your feedback to v4formath@gmail.com
We always appreciate your feedback.
©All rights reserved. onlinemath4all.com
Recent Articles
-
First Fundamental Theorem of Calculus - Part 1
Apr 17, 24 11:27 PM
First Fundamental Theorem of Calculus - Part 1 -
Polar Form of a Complex Number
Apr 16, 24 09:28 AM
 Polar Form of a Complex Number
 -
Conjugate of a Complex Number
Apr 15, 24 11:17 PM
 Conjugate of a Complex Number